

To our IKE Customers and Community, Like all businesses, we are continuing to monitor and respond to COVID-19. Our focus at IKE is on the health and well-being of our people, their families, andRead More
If you have ever had a great day fielding poles you have experienced the mental bliss that comes from a successful day in the field. This joy, while not often acknowledged, is what truly drivesRead More


Your time is important to us. We will be following up with you soon.
Until then, here are some resources you might find useful:
Sincerely,
Team IKE
Telephone, Email, Morse Code, or Smoke Signal
 303-222-3218
  [email protected]
1-720-381-1634
[email protected]
27 April 2021


People use signs every day to convey messages and spread awareness. Signs help businesses establish a recognizable brand and differentiate themselves from nearby competitors. A well-designed sign can be crucial for the growth of any establishment or company.
When a business owner decides to add or replace a sign, they will need more than an excellent design concept. They’ll need a sign shop to efficiently measure their space and make their sign a reality. As a sign producer, you will need to provide businesses initial quotes based on accurate measurements and prepare yourself for a swift construction process. So, how do you measure a sign quickly and efficiently?
Sign surface area is measured as the smallest area enclosed by straight lines drawn to the extreme points, or extremities, of the sign’s overall design. Depending on the sign’s design and any visible boundaries, an ellipse that fully contains all extreme points may be used to calculate sign surface area instead.
A business’s sign is generally influenced by a collection of design elements — including the various letters, figures, symbols, pictures, logos and trademarks used and their configuration. Sign surface area must include all these elements, so your measurements must extend to and enclose even the most far-reaching details on the sign.
Before measuring, remember that each state and local zoning authority has the responsibility to develop their laws and procedures regarding outdoor advertising and commercial signs. These state and local laws should include the regulation of size, lighting and spacing for all signs in commercial and industrial zones and are essential for anyone aiming to measure and make signs for businesses that abide by the law.
Signs may be as complex or straightforward as a business owner desires, which can sometimes make them challenging to measure. The level of complexity in a sign typically correlates to the level of involvement needed in your calculations.

Ensure your clients receive the best estimates possible by utilizing different methods for measuring the square footage of a sign. While certain sign types may need additional measurements, you can save time and effort when you use the following two methods for sign surface area measurement:
To measure sign surface area with this method, you must first determine the smallest area enclosed by straight lines or ellipses drawn to the extremities of a given sign. This will establish an easy-to-calculate area that you can equate to the sign’s surface area. The smaller or closer the area is to the sign’s extreme points, the more accurate the calculations.
The signs with the most straightforward measurements will consist of one area created by a single square, rectangle or ellipse that closely contains all elements and touches all extreme points. When calculating sign surface area, you should use a maximum of three distinct areas joined at the edge or border of one another. Choose areas that best encompass the sign and limit the amount of unnecessary space. Remember to include any material or color that is essential to the background or needed to differentiate the sign from its backdrop, as these spaces are vital to the sign’s design and construction.
Once you’ve determined the smallest enclosed area for a sign — whether it’s one area or a maximum of three combined areas — you can use the following formulas to help calculate sign surface area:
You can use this method for most types of sign areas. In the case of freestanding ground signs that require an external support structure, like monument signs, you must follow additional specifications. A maximum of two support areas is permitted to ground signs and can be excluded from your calculations of maximum areas for sign surface area. The base or poles must be under 2 feet wide and 1 foot in height from the ground to the sign’s base. Include any extra support areas and supports larger than the stipulated width or height within the sign surface area calculation.
The eight-line method uses a slightly different concept for creating an easy-to-measure, accurate area for a sign. To calculate the square footage of a sign using this method, you will need to adapt your way of thinking about the process. The steps of the eight-line method include:
Whichever method you choose, your illustration must be drawn to scale and show any calculations you used. This way, you can get more accurate measurements, remain organized and reassure customers about your process and professionalism.
There are a few specific placements for a sign surface that businesses prefer when displaying their signs. While you can’t predict the exact designs your shop will encounter, you can generally expect the signs you create to be placed in similar areas. Below are the top six sign areas you can expect to see. Familiarize yourself with the measurement process and creation of each type to best meet any customer’s needs:
When you calculate building sign area or wall sign area, it is critical to measure the facade where the finished sign will live. Use the following regulations to determine the area of a building’s facade:
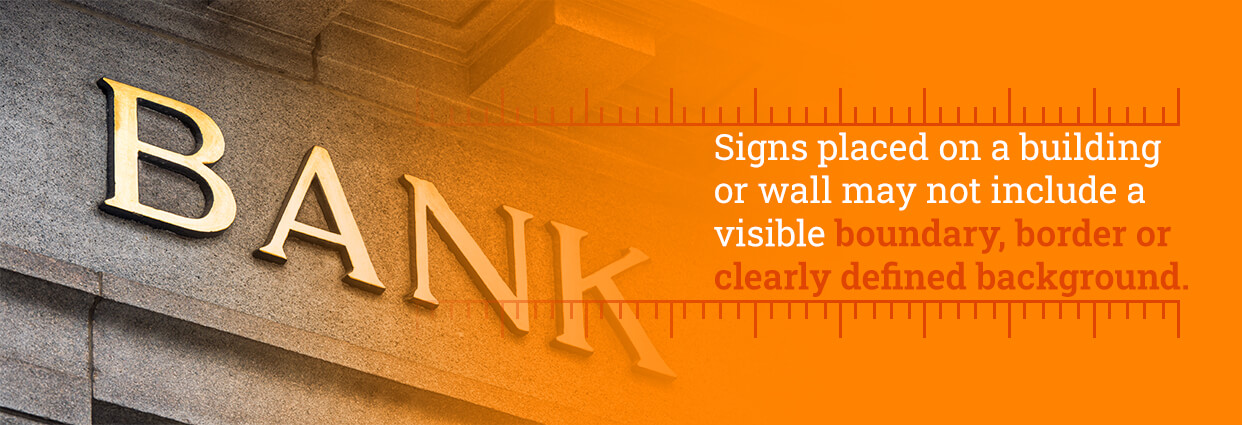
Signs placed on a building or wall may not include a visible boundary, border or clearly defined background. In this case, it is necessary to keep the spaces between letters, logos and other sign elements within your calculation of the overall sign surface area.
Remember, you can exclude wall area from the sign surface area measurement if the width of a facade surpasses three times its sign’s width. Walls less than three times the width of their signs will be considered part of the background and must be measured as part of the sign surface area. This change can significantly impact your sign calculations, construction plans and project costs.
When calculating the ground sign area, otherwise known as the monument sign area, you must always measure the sign’s freestanding surface. Ground signs generally have ornamental shells and external support structures like posts, poles or a monument-style base. Depending on certain factors, you may need to include the support structures in your calculation of sign surface area.
It is crucial to determine whether support structures can be excluded from your measurements, as this can save you time and money later on. Provided they are only used to support the sign, you can exclude a maximum of two support bases from your calculations. They must be less than 2 feet in width and 1 foot in height.
Support bases that exceed these stipulations — either surpassing the allowed number, width or height or serving a purpose outside of support — must be considered part of the sign’s background and included when measuring sign surface area.
Similar to how you must measure the facade of a building for any building signs, you will need to calculate the window’s area for window signs. Window area can be an individual pane of glass or the cumulative square footage of a continuous area of glass occasionally separated by structural and nonstructural materials. You should calculate window panes divided by muntins or mullions as one collective window area.
You can measure the window sign area in two ways. You may choose to calculate sign elements like lettering, logos and graphics as individual signs. This is a long process that results in a smaller sign surface area. Alternatively, you can multiply the overall width by the overall height of the various sign elements’ — resulting in an easy-to-measure, rectangular sign surface area.
To calculate awning sign surface areas, you must include all areas with sign elements and all translucent regions. Striped graphics and patterns typically seen on awnings are considered additional sign elements that you must add. In addition to the awning’s front, you should account for one of the parallel sides attached to the building if it is made of translucent material or shows a sign.

To calculate canopy sign surface areas, you must add the signs on all sides of a freestanding canopy structure together. Canopies seen over gas station pumps with the business’s name displayed on multiple sides are an excellent representation of this form of sign.
Multifaced signs generally contain either double-sided sign areas or V-shaped sign areas. The following regulations will help you know when only one side of a multifaced sign needs measured and when you must measure all sides.
Calculate only one side of a multifaced sign when the distance between the two faces — which are placed back-to-back — is less than 2 feet apart or at less than a 15-degree angle from one another. If two sides have differing sizes, take the larger measurement as the sign surface area.
Calculate all sides when the distance between sign faces is more than 2 feet apart. If you can simultaneously view multiple sign faces, this is an excellent indicator that all sides must be calculated. Individually measure every sign face visible from any one point, then add them together for the overall sign surface area.
Measure spherical signs as though they are flat. This rule should also apply to signs with three-dimensional objects that protrude from a sign’s surface out to 8 inches or less.
Objects that project more than 8 inches will need to be measured using the best approximation of two-dimensional geometrical shapes. For example, a three-dimensional ice-cream cone’s sign surface area may need to be calculated using the closest-fitting cylinder and cone’s surface area measurements.
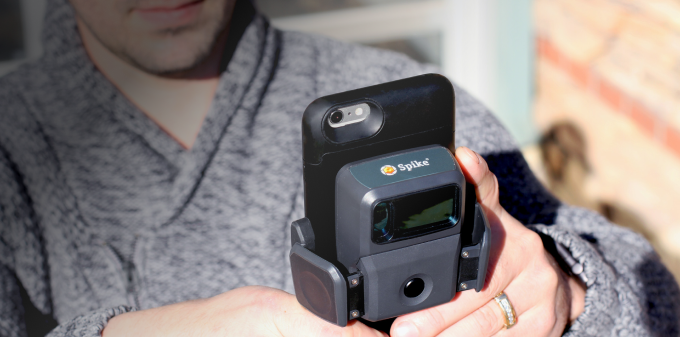
Spike is an all-digital measurement solution that measures and estimates signs faster than the traditional, manual methods. While understanding conventional measurement methods is vital to any construction job, Spike will save you time, money and effort on the initial task with accurate and consistent measurements every time.
The manual measurement process is lengthy and can consist of multiple calculations. Spike provides the same accuracy or better when compared to traditional methods due to its smart laser technology and reliable photo-verified estimates.
When it’s time to complete your next measurement task, depend on Spike’s easy-to-learn process for a job done right. First, take a photo with your smartphone or tablet. From that photo, you can estimate the height, width and area of an existing sign or the approximate placement for a brand-new one. When you purchase Spike, you can enjoy the flexibility of transferring work between your mobile device and computer.
Measure a job site safer and quicker with Spike. Your time spent measuring can reduce from hours to minutes when you choose Spike, with an average 50%-60% reduction of time. Spike is a one-person tool that allows you to send fewer workers on-site and create a safer and more cost-effective work environment.
Spike is used by over 5,000 signage professionals worldwide to accurately measure and estimate signs quicker and safer than alternative methods. Purchase Spike today for an award-winning mobile measurement solution that can help you save for the future. Because Spike generally pays for itself within three to five site surveys, you can feel confident in your purchase and experience a better way to measure signs.


For Ryan Cain, YESCO branch manager of the St. George, Utah office, conducting site surveys for signage work was traditionally an expensive process, … Continue reading "How to Measure a Sign"
Celebrating six years of ISA Membership, seven years serving the sign and graphics industry, and over 50,000Spike users worldwide! Get the most valuable … Continue reading "How to Measure a Sign"


Copyright © 2026 | ikeGPS.COM - All Rights Reserved.


 Connect
 Call
Call Support
 sign in
 IKE Value
  Meet our Team